Dispatch and run a route
Move a route from draft to ready, dispatch it, print the run sheet, change the driver, record stops and close or cancel the route.
On this page
The route page is where you send a route out and follow it until the last stop. Roles that can only read routes see the page without the buttons.
Get the route ready
A route moves through Draft, Planned, Ready, In progress and Completed (see Route and stop statuses). The main button always shows the next step:
- Plan route turns a draft into a planned route. It needs at least one stop.
- Mark ready checks the vehicle: it must be in service, have a driver who is available, carry the load and not run another ready or active route that day.
- Confirm load (optional, on the service day): scan or tick what went on the vehicle, untick what stays behind, check Signed for by and click Confirm load. Loaded orders become Picked up; unticked ones come off the route and stay at the depot.
- Dispatch sends the driver out. It only works on the route's service day; before that it is greyed out and says when it opens.
Use Edit to change the depot (drafts only), vehicle, date, start time, Return to start or the Dispatch notes. ⋯ goes back a step with Move back to draft or Move back to planned.
Print the papers
Click Print and choose:
- Run sheet (PDF): the stops in driving order, for the driver.
- Loading list (PDF): the same stops in reverse, so the last stop is loaded first.
Follow the route on the road
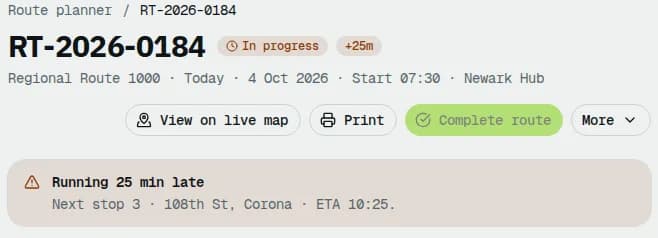
While the route runs, the page shows Stops done, Distance, Duration with the estimated end, and Capacity used. A yellow box appears when the route is running late, with the next stop and its ETA. View on live map shows the vehicle (Live map).
To record a stop for a driver who calls it in:
- In the Stops card, click Complete on the stop marked Next. Only the next open stop can be completed.
- Pick the Outcome. For Delivered, fill in Received by and tick Signature captured or Delivery photo captured when the order needs proof of delivery. For Failed, pick a Failure reason and choose whether to Restock the goods.
- Click Confirm delivery or Mark as failed.
See Failed deliveries for the follow-up.
Change the driver
- On the Driver card, click Change.
- Pick the new driver and click Make … the driver.
The remaining stops and their orders move to the new driver, who is told in the app.
When the driver changes vehicle
A driver whose vehicle breaks down can Switch vehicle in the app while the route runs. The route then shows the new vehicle, its remaining orders follow it and the live map shows the driver on it. The app refuses the switch, changing nothing, if the new vehicle is on another route, can't carry the remaining stops or doesn't meet an order's handling needs. The Activity log records Changed route vehicle to vehicle.
Finish, end early or cancel
- Complete route closes the route once every stop is done. When the driver finishes the last stop in the app, the route completes by itself and its pay per stop, package or route is booked then. A pay period that still has routes in progress shows a warning: complete them before you close the period.
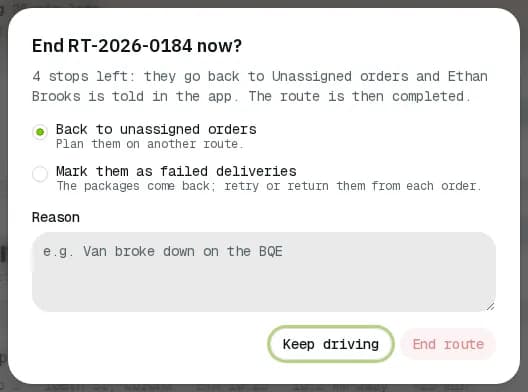
- ⋯ > End route… stops a route that cannot finish. Choose Back to unassigned orders (plan them on another route) or Mark them as failed deliveries, give a Reason and click End route. A route still open from an earlier day shows a warning with the same button.
- ⋯ > Cancel route is for routes that have not left yet. Unloaded orders go back to the unassigned list; loaded ones go to At depot. You can add a Reason (optional).
- ⋯ > Delete draft removes a draft for good.
Related articles
- Page guideRoute detailEvery part of a route's page: the status buttons, banners, numbers, map, stops table, editing and re-ordering stops, confirming the load, changing the driver, completing stops and ending or cancelling the route.
- ConceptRoute and stop statusesWhat each route status and stop status means, which button moves a route from one status to the next, what each move checks and what it does to the orders on it.
- How-toHandle a failed deliveryDecide what happens after a failed pickup or delivery: schedule a new attempt and tell the recipient, return the package to the sender, or put the order on hold.
- How-toWork the exceptions queueOne list of everything that needs a dispatcher now: failed and late orders, orders without a driver, delayed vehicles, lost signal and driver issues. Take, snooze or resolve each one.
Still stuck?
Tell us what you were trying to do. A person reads every message.